Thursday, September 24, 2009

Cute Baby Burp Cloths

I just love these baby burp cloths. They are not only practical, but they are CUTE! I don't know a single mother who could have too many of these.

I was just invited to attend a baby shower for my new neighbors daughter. I thought this would make a great gift ...


Buy a pack of burp clothes. I like the kind that has padding in the center.


Choose your fabric. This is fun! You can get really creative here. Themes, Colors, Holiday ...


Cut strips of fabric into 15" x 3" (the sizes can vary depending on how thick you want the end product).


Cut all fabric the same size.


After all of your fabric is cut into strips, then comes the ironing. This is the longest part of the whole process. First, iron the ends in to fit the width of your burp cloth. Approx 1/2" - 3/4". Then iron the long part of your fabric about 1/4" in on both sides. Lastly, fold in half evenly and iron. This should make your strip of fabric fit perfectly on your burp cloth.


Phew! All ironed.


Put your burp cloth inside your strip so that the strip is equal on both sides and pin down. Sew across. You can use a zig zig if you'd like. I just used a straight stitch. Do this on each end of the burp cloth.


I just couldn't resist this cute little puppy.


Wha La! Give this a whirl, your expecting Mom's will love them!

Thursday, September 10, 2009

Kitchen Island Make-Over - Project #1

Kitchen Island Make-Over - House Project #1

We just bought a new home :) and we are slowly starting to up-date portions of it. We started in the kitchen. The kitchen was all light maple with brass hardware. First we changed out all of the hardware to a dark venetian bronze. We love it and that alone made a big difference. The island in the kitchen is large and has a beautiful piece of granite, however, with all of the light wood, the granite basically disappeared. We thought it would be fun to paint the island black for a little contrast with the cabinets and help the granite POP out. It worked. Before we started, we added some molding around the bottom and on the sides to add texture and depth. It made a big difference in the over all look of the island. We removed all of the gloss with a deglosser and painted the cabinets with Behr Premium Plus. Here is our new look. What do you think?
We still have more to do in the kitchen: paint, add new appliances and hang a chandelier, but I think we are off to a great start!


Friday, August 28, 2009

Hootenanny Pancakes - A Real Kid/Crowd Pleaser

Hootenanny Pancake

I love this recipe! It takes me back to my childhood when on special occasions, my mom would make this for us. It was always so exciting to see the pancake puff up in the oven... and there were always dibs on the corner pieces with all the yummy, buttery crusts. Well, the apple doesn't fall far from the tree as this is one of my children's favorite breakfast now. Anytime we have a birthday or holiday, a Hootenanny Pancake is what they want to wake up to.


Hootenanny Pancake
In blender, beat
10 eggs
1 C. milk
1/4 tsp. salt
Whip about 9 - 10 minutes
While the egg mixture is blending, place 1/2 cube butter in a 9x13 inch baking dish in a 425 degree oven until the butter bubbles and sputters up.
After waiting about 10 minutes for the egg mixture, gradually add 1 1/2 cup flour and continue to beat another 3 -4 minutes.
Pour the batter into the butter. Bake 25 minutes at 425 degrees. Remove and serve! The outside edges will rise up like a large souffle. Use syrup, jam or your favorite fruit topping and enjoy!

Saturday, August 8, 2009

Penne with Creamy Roasted Vegetable Sauce and Bacon

Penne with Creamy Roasted Vegetable Sauce and Bacon

I always look forward to lighting up the grill when summer hits. I love being outside with my family and I love the smokey flavor the grill adds to the food. However, by the end of summer, if I see one more grilled burger, hot dog or vegetable, I (almost) want to turn away, run in the house and grab a good ol fashion bowl of cereal. So, recently, when we had a ton of grilled veggies left over in the fridge, I had to think of something different to do with them so they wouldn't go to waste. My children were NOT about to eat re-heated veggies ... and frankly neither was I. So, I came up with this recipe. Not only did we not waste a drop of the veggies, we inhaled them and wished for more. Actually, my children had NO idea what they were eating, they just knew it was delicious. Make good use of YOUR extra grilled vegetables by giving this recipe a whirl. You'll be glad you did!


Penne with Creamy Roasted Vegetable Sauce and Bacon
1 - 1 1/2 lbs. cooked penne
Roasted Vegetables. I used zucchini, onions, red and yellow bell peppers, and yellow squash
2 cans of fire roasted tomatoes
Splash of heavy cream.
Salt and pepper to taste
Mozzerella cheese
5 - 7 pieces of cooked, crumbled bacon
Cook pasta according to package directions. Drizzle with a splash of Extra Virgin Olive Oil to prevent sticking.
In a sauce pan, add your vegetables and two cans of fire roasted tomatoes. Blend together with a hand blender and bring to a simmer. Add cream and salt and pepper. Blend until everything is incorporated. You can either make this a thick and chunky sauce or blend it until it is smooth. I blended my sauce to be fairly smooth.
Add sauce to noodles and toss together. Spray a casserole dish with a little cooking spray and add noodles and sauce. Top with Mozzerella cheese. Cook in 350 degree oven for about 20 - 30 minutes or until cheese starts to bubble and brown. mmmmm yummy. Add crumbled bacon on top and serve. Enjoy!

Saturday, June 27, 2009

Chopin

Prelude in C Minor

Op. 28, NO. 20

Chopin

I love music. It touches me to the core. When I am listening to something - whether it is an instrument, somebody singing or a beautiful string of notes, I stop in my tracks, close my eyes and embrace it. It fills me, almost like air. I breath deeper, I smile more, I feel at peace... and I feel renewed and grateful for others that share their talents. I am not a concert pianist, but I love this song and wanted to share it. I just learned how to play this piece and I am glad that I got outside of my "regulars" and learned something new. Find something that you love and learn something new. It feels great!

Friday, June 26, 2009

Chocolate Cake Balls

Chocolate Cake Balls

I have been wanting to make these delicious little morsels since the first moment that I saw them on Bakerella. I just didn't have the time UNTIL .... I recently drove down to Texas with my mom and children to visit my sister and her family. My cute niece, "S" loves to cook and she whipped out the ingredients to make these Cake Balls. I was so excited. They do take a little bit of time, but they are simple and worth the wait. These little bite size pieces of heaven will cheer anybody up.. and a little goes a long way. One cake mix makes about 70 cake balls, so package some up and give to a neighbor or throw them in the freezer ... OR you will eat them ALL!


Bake a cake (any flavor)

After it has cooked and cooled some, smash it with a fork into cake crumbs.


1 bowl of cooked cake crumbs :)

Add one container of frosting (again, any flavor.... You can get really creative with combinations)

Mix the cake crumbs and frosting together

With your hand, roll crumbs and frosting into 1" balls and chill for a couple of hours

In a double broiler, melt some chocolate and dunk chilled cake balls in and coat.

After you cover the with the chocolate, place on a parchment lined pan and top with your favorite toppings. We used sprinkles, toffee, and white chocolate


Wha La! Enjoy!

My neice takes all of the ingredients babysitting and does this as an activity with the kids. They love it and everyone can participate.

Monday, June 15, 2009

Chocolate Banana Cake

Today was a great day. My mom, sister and I had a day of being pampered. Pedicures, hair cuts, girl time. It was so much fun. Later on while we were thinking about what to make for dinner, I noticed a large pile of very ripe bananas. Hmmmm. So, first I thought I would make my sister-in-laws Banana Cake, but there was no yellow cake mix to be found. HOWEVER, there was chocolate! I started thinking.... I love chocolate covered bananas and I love Chocolate Chip Banana Bread, so I was pretty sure chocolate would fit nicely into the equation. I mean, really, what does chocolate not go with? I was right! This cake is moist, flavorful and delicious - especially with the vanilla glaze. It really adds a nice sweetness to the cake! It was a perfect way to end our day of pampering. After all, any day that invovles being pampered wouldn't be complete without a little chocolate ... right?

Next time you have a pile of ripe bananas and don't want to make MORE Banana Bread.... Give this recipe a whirl. You'll love it!


Chocolate Banana Cake

4-5 ripe bananas
1 box chocolate cake
1/4 tsp. baking soda
3 eggs
1/2 cup oil
1/3 cup water

Vanilla Glaze

1 1/2 - 2 cups powdered sugar
2 Tbsp. melted butter
about 1/4 cup milk
1 tsp. vanilla

Preheat oven to 350. Mash the bananas in a medium size bowl. Add the baking soda. Add the cake mix, eggs, oil and water. Mix together with an electric mixer until well blended. Pour into a greased 9 X 13 pan. Cook in the oven on 350 degrees for 25 minutes or until baked through.

Mix glaze ingredients together and pour over a cooled cake.

** I put my glaze on while the cake was hot because I was ready to taste it, but it will look prettier if you wait until it is cooled... IF you can wait!

Saturday, May 23, 2009

Night Sparks

Night Spark
Tonight we were out as a family enjoying the beautiful view from our porch. Off in the distance, to the north, we could see a big storm brewing. The sky was darkening and the rain was blending the earth and sky together. It was magnificent. My husband went straight for the camera and this is what he caught. Here's how.... aperture was set to F10 and the shutter speed was 15 seconds. The camera was also on a tri-pod - very important. He kept clicking the button until he got the shot. The kids LOVED it. This was time well spent as a family. Go grab your camera on the next storm and see what you get.

What do you see in this picture? A heart? A profile of a man? A chicken? Amazing power!

Friday, May 22, 2009

Chinese Steamed Sponge Cake with Coconut Icing and A Really Great Book

The whole inspiration behind trying this cake was a book. This is not just any book. This is a book that touches all emotions, that makes you look inward, that makes you want to fight with every fiber of your being for that which is right and good. This is a book about an inspiring lady who had the faith, perseverance and tenacity to do just that. The title... "Life and Death in Shanghai" A personal account from the author, Nien Cheng ,of her survival during the Cultural Revolution. My mom chose this book for her book-club. Thanks, Mom, for sharing this wonderful book. It has inspired me. I give it 5 STARS!
Well, since this book is about the Chinese culture, my mom carried the theme into the rest of her bookclub. It was delightful. She even had the ladies, upon arrival, take off their shoes and put little booties on. The conversations were wonderful, the food was fabulous and the memories are cherished! Here is a snippet of our afternoon.

This was the Steamed Sponge Cake I made. Look below for the recipe.


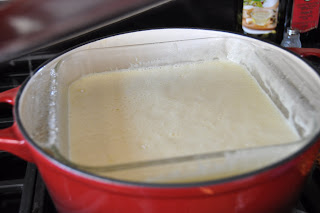
Cake being steamed in my dutch oven.

This is how it looked when it was done steaming.


My beautiful Mom. The author of a wonderful afternoon.


These are homemade Pot Stickers that my Sister-In-Law made. I just had to take a picture. Aren't they beautiful? They were SO GOOD! I think I could have eaten a dozen by myself. Something I will be making very soon....


Here's the spread... Chinese Chicken Salad, Pot Stickers, Spring Rolls, Rice, Sesame Seed Rolls, Fortune Cookies, Chinese Sponge Cake, Herbal Tea, and lots of little Chinese goodies from the Chinese market. Oh and don't forget your chop stix! What fun.


This was a really easy recipe to make. I know there are more elaborate versions of this cake, but this worked out really well and was really good.
Chinese Steamed Sponge Cake with Coconut Icing

Sponge Cake
1 cup cake or pastry flour
1 tsp baking powder
1/4 tsp salt
4 eggs
3/4 cup sugar
1 tsp almond extract
1/4 cup coconut milk
Coconut Icing:
2 TB plus 1 tsp pineapple juice
1 TB plus 2 tsp cornstarch
1 cup coconut milk
1/2 cup sugar
To Make the Cake: Line the bottom of a cake pan with parchment paper. Prepare a wok for steaming.Place the flour in a medium bowl. Sift in the baking powder and salt and set aside.In a separate bowl, add the sugar to the eggs and beat until they are frothy (about 3 minutes). Stir in the almond extract.Gradually add the flour mix to the egg mixture, stirring. Add the coconut milk. Stir until you have a smooth batter that is thoroughly mixed, but do not beat.Pour the batter into the pan (ideally it should only come 2/3 to 3/4 up the side of the pan). Steam for 30 minutes or until a toothpick comes out clean. Cool and remove from the pan, turning the cake over. Cut the cake into squares or diamond shapes.
To Make the Coconut Icing: In a small bowl, mix the pineapple juice and cornstarch and set aside.In a medium saucepan, bring the coconut milk and sugar to a boil, stirring occasionally. Add the pineapple juice/cornstarch mixture, stirring. Cook for a few minutes on medium-low heat to thicken. Cook for another minute, then remove and use to ice the cake. Chill the cake until the icing stiffens. Refrigerated in a sealed container, the icing will keep for a few days. It can be used again to ice another sponge cake, or as a simple (but sweet!) dessert for one to two people.
*** A few notes. I did not have a wok and so I used my dutch oven. It worked great. I also toasted some coconut to put on top of the icing. I think it was a delicious addition!

Thursday, May 21, 2009

Creamy Lemon Pasta

Okay, this is one you must give a whirl. It is a dish that can be dressed up or kept simple ... the results will be delicious no matter what! My husband (who is not a huge pasta fan) LOVED it and said I could quote him saying that this was his favorite pasta. Yeah.... Happy wife! I got the base for this recipe from The Pioneer Woman. She is AWESOME! Then I added a few of my favorite ingredients that brought a smile to my face. This fed my whole family (kids loved it as well) and then had plenty of left-overs for lunch the next day. I was one happy girl when I remembered this was in my fridge! Selfishly, I hurried and ate some for lunch before anybody else realized it was still there.... Well, so I don't get mother-of-the-year award. It was worth it!


Creamy Lemon Pasta

1 lb. of penne rigate
4 tbsp. butter
2 tbsp. olive oil
2 gloves garlic, minced
1 1/2 cups sliced mushrooms
2 cups sour cream
zest of one lemon
juice of one lemon
1/2 tsp. kosher salt
3/4 cup - 1 cup of shredded fresh parmesan (the more the merrier in my book)
7.5 oz. jar of marinated artichoke hearts
2-3 chicken breast, shredded
Handful of fresh parsley, chopped

Cook noodles, drain and set aside. (I like to drizzle a little olive oil on the noodles so they don't stick to each other) Melt butter and olive oil together on medium heat. Once melted together, add mushrooms and garlic, saute until mushrooms are golden. Stir in 2 cups of sour cream until smooth. Add lemon zest, lemon juice and salt. Stir together. Add artichoke hearts, chicken, paremsan cheese and fresh parsley. After the ingredients are all blended , pour over the cooked noodles and toss well. When you serve, you could add a little more lemon juice on top with a fresh sprinkle of parmasan cheese and parlsey. Really, really good!

** If you want to keep this more simple and kid friendly, follow the Pioneer Woman's recipe and leave out the following: mushrooms, chicken and artichoke hearts. It is so refreshing and delicious. A perfect dish for Spring. Enjoy!

Friday, May 15, 2009

Kid Friendly Chicken Enchilada's

So, I didn't intend on adding this because it is one of those recipes that you throw together last minute. However, my children gobbled these enchilada's up, so I thought maybe it was worth adding to this blog. Yesterday, I roasted probably 20 chicken breast (long story), so I had chicken ready to shred and use. This was a perfect use for it. Enjoy!


Kid Friendly Chicken Enchilada's

4-5 cooked chicken breast, shredded
1 10 oz. can of mild enchilada sauce
1 can of fire roasted tomatoes
1 tsp. onion powder
1/2 tsp. garlic powder
2 cups of mexican blend cheese
olives
cilantro
8 flour tortillas

With a hand blender (affectionatly called the "boat motor" in my family), blend the enchilada sauce, roasted tomatoes, onion and garlic powder. Coat each tortilla with the sauce, add chicken, cheese and another spoonful of sauce down the center. Roll up and place seam side down in a 9x13. Top with left over sauce, cheese and olives. Bake at 350 degrees for 30 minutes.
After you take it out, add your fresh cilantro and Enjoy!

Saturday, May 2, 2009

Grilled Artichokes with Lemon Mayonnaise

These grilled artichokes will have you licking your fingers! I made these for lunch today and my kids and I gobbled them up in a matter of minutes - even my 5 year old little girl. We savored each leaf until we made our way to the delectable heart. DELICIOUS! They do take a little time to make, but I promise they are worth the wait!

To prepare your artichoke, cut off the top inch to remove the spikes. Then cut the tips off of the rest of the leaves. Spread the leaves and rinse well under water. Rub with lemon all over.

Place the artichokes in a pot with an inch and a half of water and cover. Cook on medium high heat and steam until tender - about 30 to 40 minutes. You can tell when they are done by gently pulling on a leaf to see if it comes out. If it does, they're ready. Drain water off of each artichoke and let cool for 15 minutes. Cut in half length wise and remove choke.


Make marinade and put in a zip lock bag. I like to do this while the artichokes are cooking. Place the cooked artichoke halves into the bag and coat well. Put in the fridge for at least a 1/2 hour to let flavors blend. After they have chilled, put halves open side down on a hot grill. They only need to grill on each side for a few minutes.

Grilled Artichokes with Lemon Mayonnaise

2 large artichokes

Marinade

Blend well together:
3/4 cup of Extra Virgin Olive Oil
2 garlic cloves, minced
1 1/2 tsp. course salt
freshly ground pepper
juice of 1/2 lemon

Lemon Mayonnaise

1/2 a cup of real mayonnaise
juice of 1/4 lemon
Mix together


ARTICHOKE FACTS
*High in fiber, potassium, calcium and iron
* Positively helps poor liver function
* Has been known to improve skin luminosity

Sunday, April 19, 2009

A Small Thank You


This is a post near and dear to my heart.   After having my brother serve across seas in Afghanistan and Kuwait as an Apache Helicopter Maintenance Test Pilot,  I know a small (and I mean very small) part of the sacrifice our Military men and women go through.  They leave EVERYTHING behind to serve our great country: Family, Friends and all of the comforts of home.   I appreciate so very much their courage and selflessness.  They are the bravest people I know. 

As a way to say, "Thank You"  our family joined the group Operation Baking Gals.  This is a group put together by some ladies who bake homemade goodies and send them to soldiers serving in the states and across seas.    All you do is go to bakinggals.com,  sign up with a group OR you can host a soldier that you know.  Email the Team Leader to get the address, bake something yummy that will last in the mail and ship it on it's way.  What could be easier? 

I know that when my brother was away, packages from "home" were priceless to him.   I want him and every soldier to know that we love them, appreciate them, and pray for their success and safety.  Thank you so very much Military men and women!  My family is safer because of you!

As a family, we spent an evening writing letters and coloring pictures to our soldier and then baked good old fashioned Chocolate Chip Cookies.  This was his favorite cookie and what he wanted most.  We packaged up the cookies (the web site tells you how to best do this.) and sent them to Iraq.  I hope when he opens our package he knows of our appreciation.

Please, Give This One A Whirl....  what better way to teach about service than to serve those who are serving us!  After we sent our small package, my heart felt like bursting and I smiled the rest of the day.


Wednesday, April 15, 2009

Hearty Oatmeal

What better way to start a cold, rainy day than with a warm bowl of oatmeal?  This is a recipe that will have oatmeal critics begging for more.  It is hearty, healthy and delicious.  If you think you don't like oatmeal... Just Give It A Whirl and see what you think.

Hearty Oatmeal

2 cups of your favorite dry oatmeal.  Not instant.
4 - 6 dried apricots cut into small pieces
1/4 cup craisins
1/2 cup chopped walnuts or pecans - toasted 
1/2 tsp. vanilla
1 tsp. cinnamon
1/4 cup brown sugar (or to taste)
Milk

Begin cooking your oatmeal according to its directions.  (Usually you double the water) 
Add your apricots, craisins, vanilla, cinnamon and brown sugar.  Stir and cook until done.  The water and heat reconstitutes the dried fruit and makes them plump and delicious.  Dish your bowl and then add a handful of toasted walnuts on top.  Pour some milk in your bowl and enjoy!   

OATMEAL FACTS

* Low glycemic index
* Can lower blood cholesterol and blood pressure
* May reduce the risk of heart disease
* May reduce type 2 diabetes
* Contains vitamins, minerals and antioxidants

Monday, April 13, 2009

Easter Family Treat - The Empty Tomb

I realize Easter is over, but I thought this fun treat was worth documenting. After having a Family Night about Easter, we indulged on these yummy, sweet treats that carry a message with them.
I did find this idea online but added a little something to make them extra sweet! Put this recipe in your files for next year and Give It A Whirl! You won't be disappointed.


The Empty Tomb

Your favorite roll dough
Large Marshmallows
Melted Butter
Cinnamon sugar

Choose your favorite roll dough recipe or defrost some Rhodes dough.
Get a small piece of dough and flatten it out. Wrap the dough around the marshmallow and seal all the edges. Cover the roll in melted butter and then roll it around the cinnamon sugar.
Place on a jelly roll pan and cook at 350 for about 10 minutes or until done.

When you open the roll, it will be hallow. The marshmallow melts creating an "Empty Tomb" The kids thought this was really amazing.... and DELICIOUS!